I love Arduino IDE. It is so easy to use and learn and not to mention user-friendly. Furthermore, the IDE provides the basic syntax for programming IoT devices which is a major plus.
However recently as I work on bigger IoT projects, I have grown a bit frustrated with the IDE. Firstly, it has no debugging options. Do you know the frustration of spending three days trying to figure out why your code is not working only to find out you forgot to close a function!? And the worst part, the IDE cannot show you exactly where the error is and highlights the entire code.
Secondly, it cannot be integrated with repositories such as GitHub. I love uploading my code to GitHub while working on it in case something happens to my laptop. God knows how many times my laptop crashed and I had to restart a code that I was two lines away from finishing.
Well, this article is not meant to express my frustration with the Arduino IDE, rather, I intend to convince you why you should use PlatformIO because it has made a positive impact on my work.
However, if you are a beginner in IoT, I recommend you stick with Arduino IDE because, at that stage, things like git integration and debugging are not important. Plus the IDE is more user-friendly as compared to PlatformIO.
“PlatformIO is a cross-platform, cross-architecture, multiple frameworks, professional tool for embedded systems engineers and for software developers who write applications for embedded products.” -PlatformIO documentation
It is a development tool that can be added as an extension to VS Code, Atom, Sublime Text, Code blocks, Eclipse, or Netbeans; and used to program microcontrollers.
For this article, I will be using VS Code code editor with windows OS for the demonstration.
Installing platformIO
You will need to install VS Code and python 3. The instructions for installing the two can be found on their official websites as directed by the links.
Install the platformIO plugin for VS Code. Click the extension icon in VS Code (This can be found among the icons on the left of the editor). When you click on it, it opens a search bar where you will type platformIO and search. Install the plugin and restart VS Code.
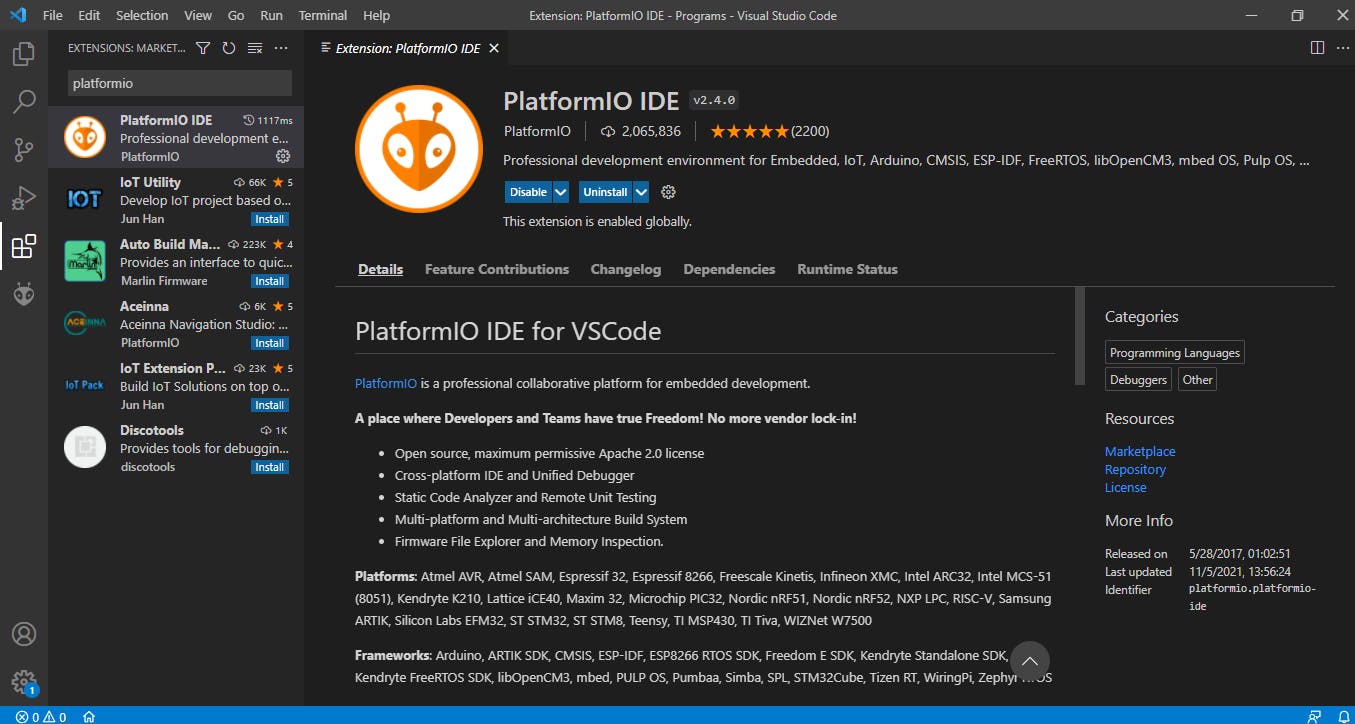
Let's explore the basics
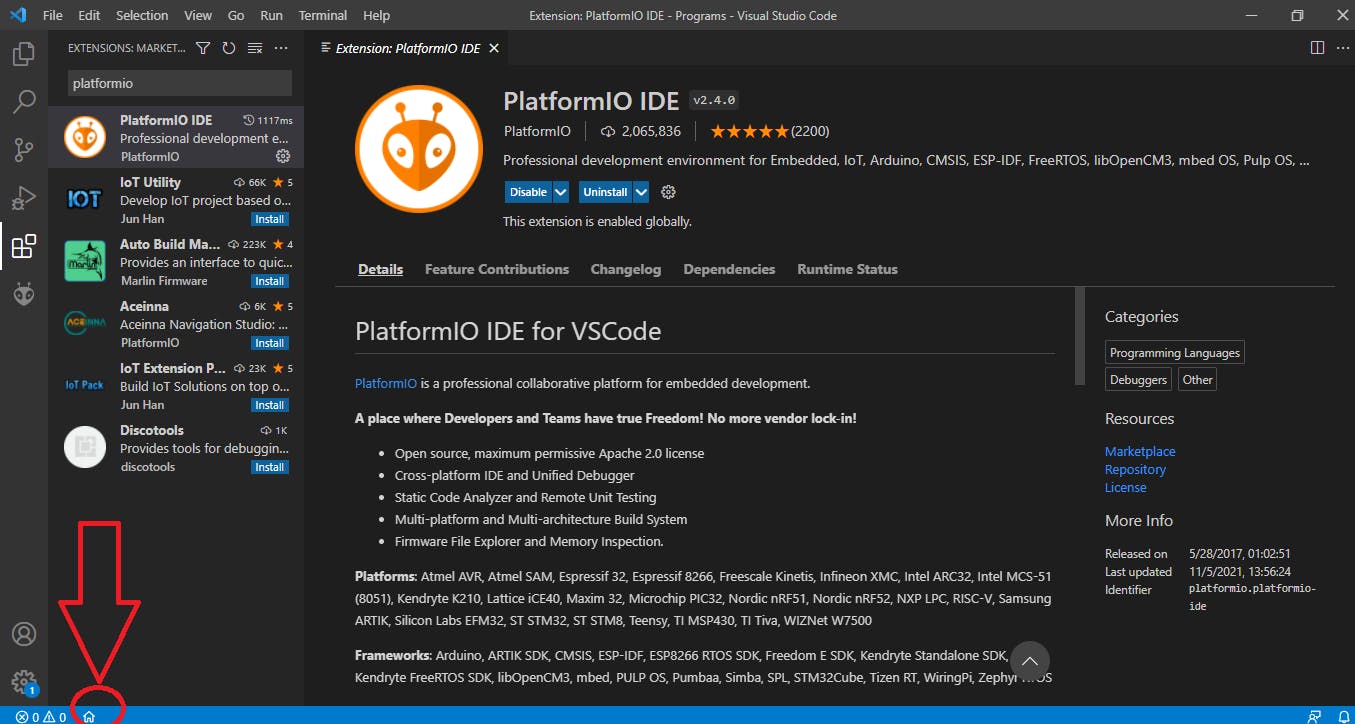
When you start VS Code, click on the home icon below the page as indicated below.
 This opens the home screen for PlatformIO as shown below.
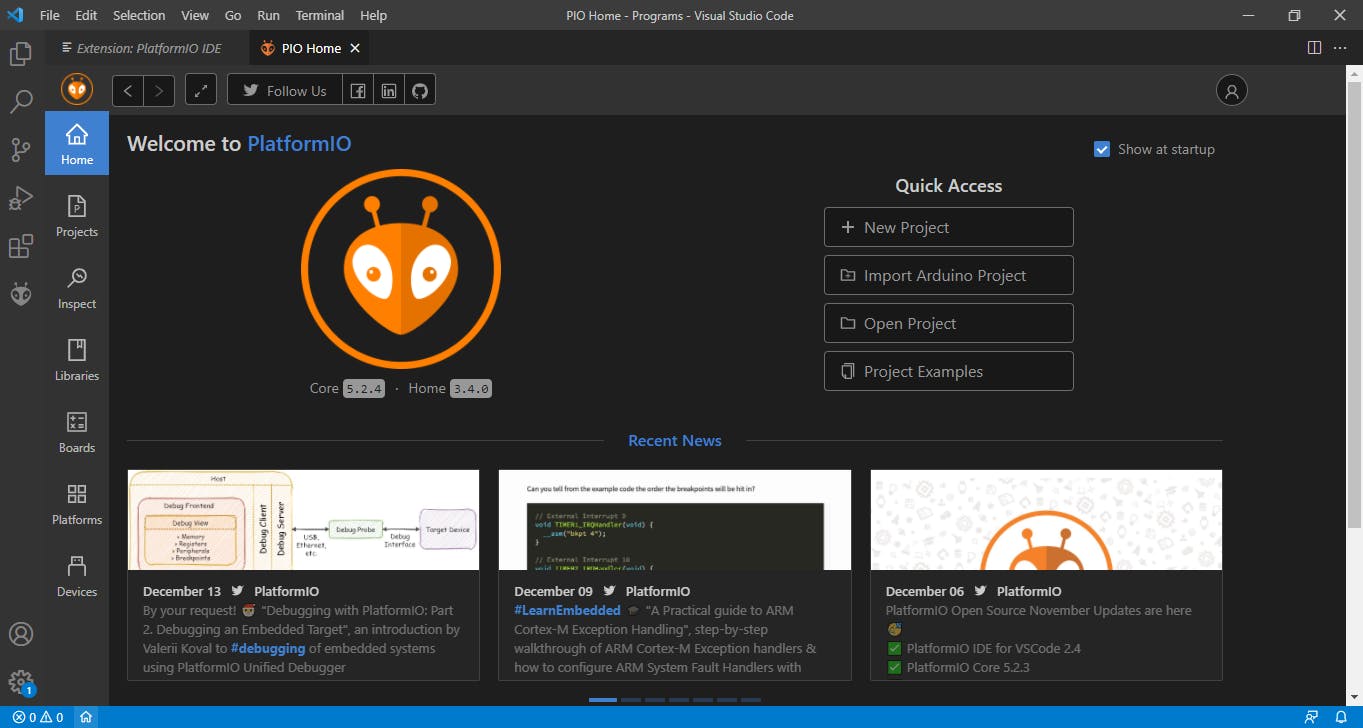
On the left on the home screen, the icons presented function as explained below:
Home - This is the home screen of platformIO
Projects- The Icon through which you create a new project or view existing ones
Inspect- This allows you to inspect memory utilization of the code
Libraries - Similar to library manager in Arduino IDE
Boards - Similar to the boards' manager. This is where boards supported by PlatformIO are listed.
Platform - Where different platforms like ArduinoAVR and Espressif ESP32 are listed.
Devices - where the COM port of your board is shown. PlatformIO detects this automatically and there is no need for you to manually select the port.
Your first PlatformIO Code
I will demonstrate how to create projects in platformIO using Arduino's version of the 'hello world' program; the blink LED code.
Go to projects -> Create new project -> Add project name -> Select Arduino Uno for the board ->For the platform, select Arduino -> Add location to store the code.
If it is the first time creating a project, it may take quite some time before the project is initialized.
A number of files are created after initialization. Our main code is in src folder named main.cpp.
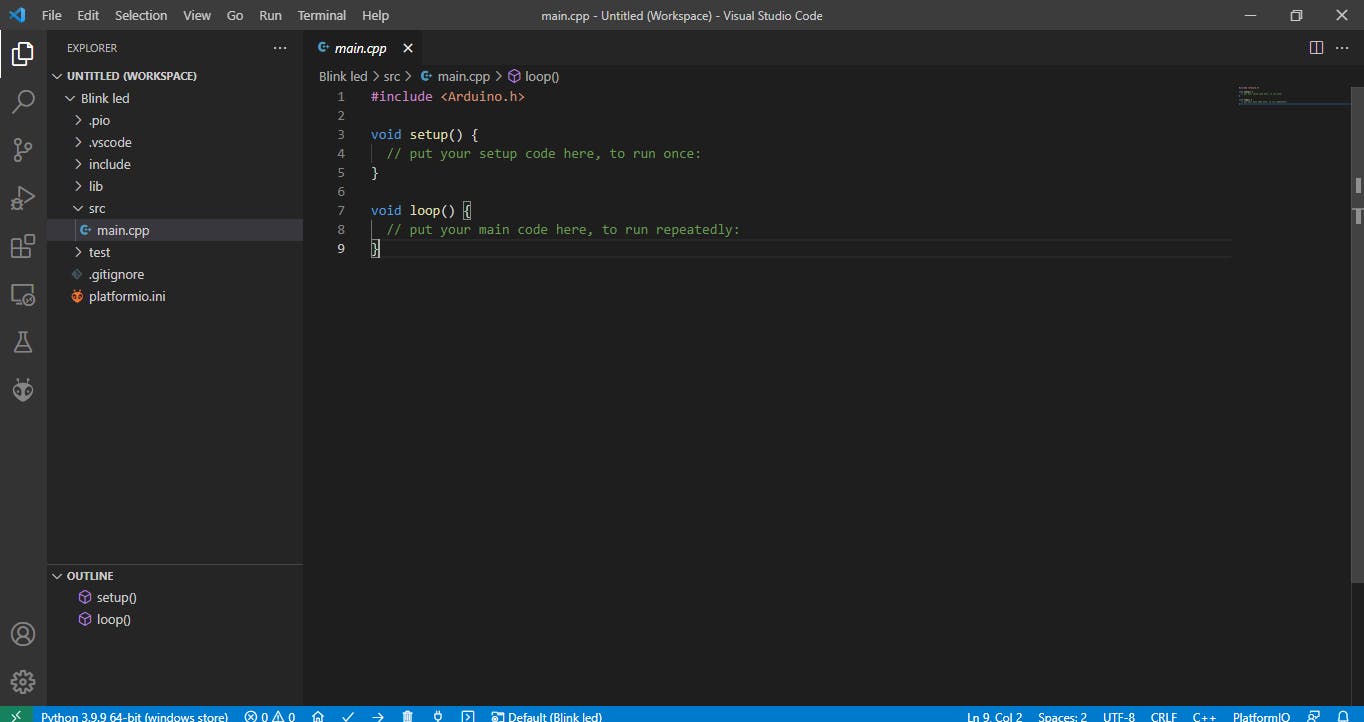
The code structure is similar to Arduino IDE's syntax. The code itself is the basic blink LED code, so it hardly needs an explanation.
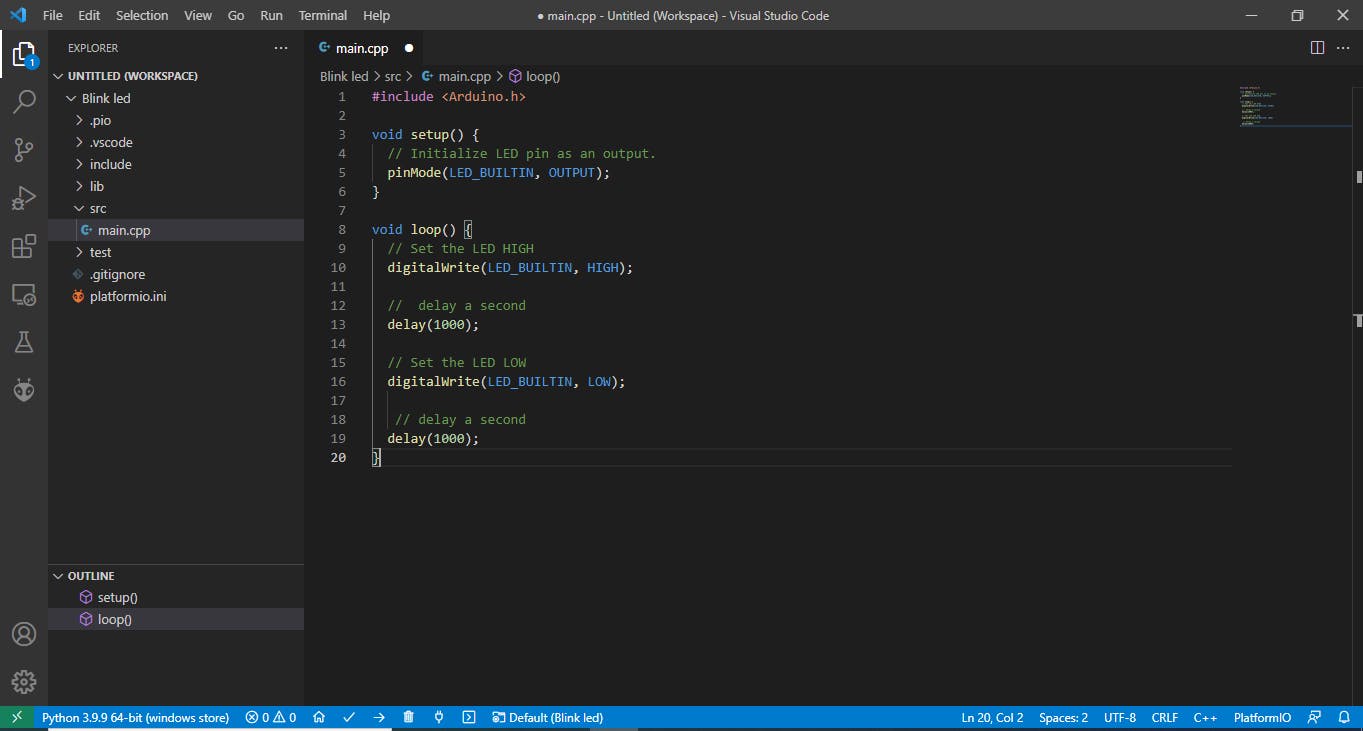
Connect your Arduino Uno board to your laptop.
Compile the code with the build icon which can be found in the toolbar below the screen. If it compiles successfully, click the upload button just next to compile.
PlatformIO automatically selects the COM port so it should upload to your board without any problems and you should see the familiar flashing LED as a result.
VS Code provides git integration functionality so you can connect your project to GitHub and automatically push any changes made.
Additional Note When opening a folder in platformIO, ensure you open the software folder directly, not as a subfolder of a larger folder otherwise it will result in an error.
