


Miss Smart Home Projects
The Big Problem
My room has only one switch and it's thousands of miles away from my bed, (I mean it feels like that when am about to doze off and I realize I forgot to switch off my light).
I find it really annoying because I am one of those people who can't switch off their light until they are 'sleepy enough', otherwise I will turn and toss the whole night.
One night as I was watching my light with sleepy eyes, hoping I could turn them off telepathically and avoid the cold horror of leaving my warm blankets to walk on the freezing floor towards the switch, I realized something. I was an IoT Engineer struggling with a problem I had literary helped clients solve!! I know, the irony!!😂
So thus started my journey of research and development to solve my problem. I named the project, 'The Lazy Switch'.
Origin of the name: The only reason I was making this project was because I was too lazy to get out of my bed and switch off the lights, hence the name: 'The Lazy Switch'. I have been told I am not good at naming but I think this was genius. 😁
The Journey Starts
One thing you need to remember is that my room has only one switch. Therefore, my options of making a 'smart' switch were to either convert the manual switch to a smart one or to add a 'smart switch' to the manual switch.
At the moment, these were the only options that were feasible based on the resources I had within reach.
As a reference, below is an image showing the circuit of the manual switch:
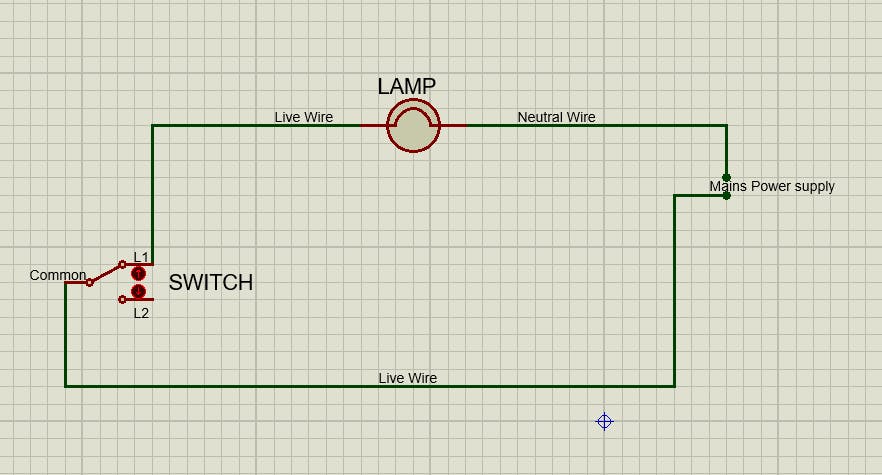
I decided the smartest option was to turn my existing switch into a two-way switch, with one of them being the smart switch.
This is how envisioned the switch would work: It would a proximity contactless switch; I could turn it on/off by placing my hand near it. All I needed to do was place the switch near my bed somewhere it could not be triggered by me turning and tossing in the middle of the night.
I needed to outline the components required, understand how to convert the one-way switch to a two-way, and build the Lazy Switch. Simple, right?
The Answer
To make a smart switch, I would need a switching device. The two main options I had at the moment were a relay and a transistor. I ruled out the transistor because I was not too conversant with it.
A major advantage of using the relay was that it can handle up to 240 VAC. *The one I was using.
I would then need the proximity sensor. I had the options of an IR sensor, a PIR sensor, or an Ultrasonic sensor.
In a previous project, I found out that the IR sensor I had in availability was affected by many factors such as the temperature of the room, sunlight, or humidity; which could mess up its functioning.
The PIR sensor creeped me out. The PIR works by detecting heat energy in its proximity which the human or animal body emits. I imagined the lights suddenly lighting up in the middle of the night and I am not anywhere near it. If I have ghosts in my room, I rather not know about it.
So I decided to go with the ultrasonic sensor. It had a major advantage in that I could code the exact distance at which I wanted my hand to be detected.
The only thing remaining was to select the microcontroller that would make the switch 'smart'. I wanted something small as my device only needed about 3 IO pins (For the relay signal and 2 for the trigger and echo pin of the Ultrasonic sensor.
The smallest microcontroller I could find then was of the Attiny family, and I decided to go with the Attiny13A. However, how could I power it? I would have to make an AC-DC converter for it which would increase the cost of development. So I decided to go with the good old Arduino Uno for prototyping purposes.
Finally, I had to consider how I would connect my relay to the AC switch, and decided I would go with terminal blocks.
Summary of Requirements
- Arduino Uno
- A relay: SRD-05VDC-SL-C model
- An ultrasonic sensor
- Two Pin terminal block
Now, down to business. First, I needed to understand how I could convert the one-way switch to a two-way switch.
Converting a One-way to Two-way Switch
This step was the determinant of the project. If I could not figure this out, I would consider the project failed and throw it into the WIP(work in progress) file which holds projects I haven't been able to finish since 2019's.
Here is an outlay of how 'normal' one-way switches are converted to two-way switches.
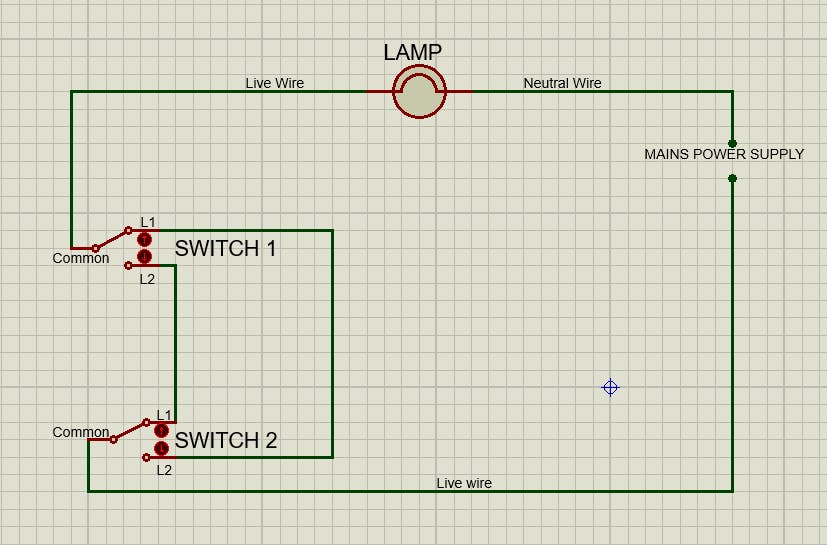
All I needed to do was replace the second switch with a relay.
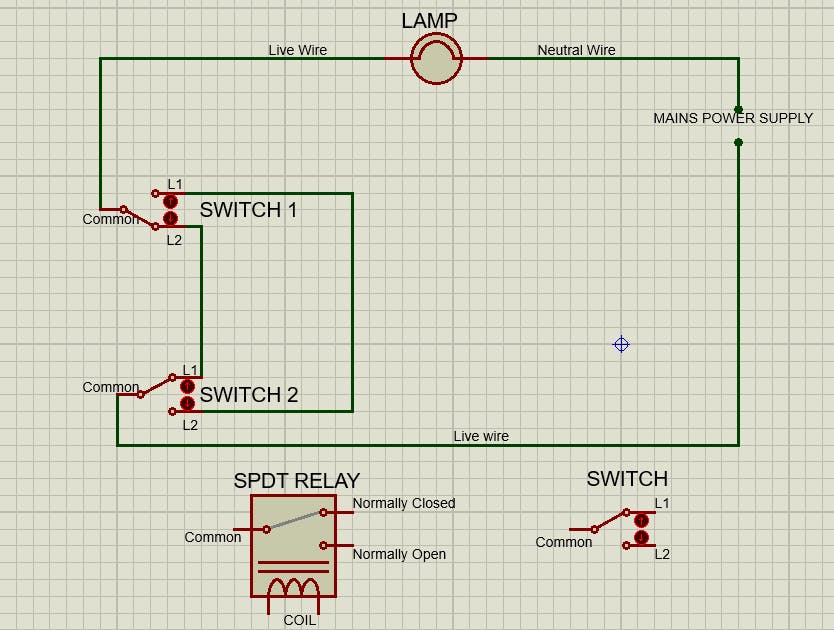
The L1 would be replaced by the Normally Closed relay pin, the L2 by the Normally Open Pin, and the common by the common as shown below.
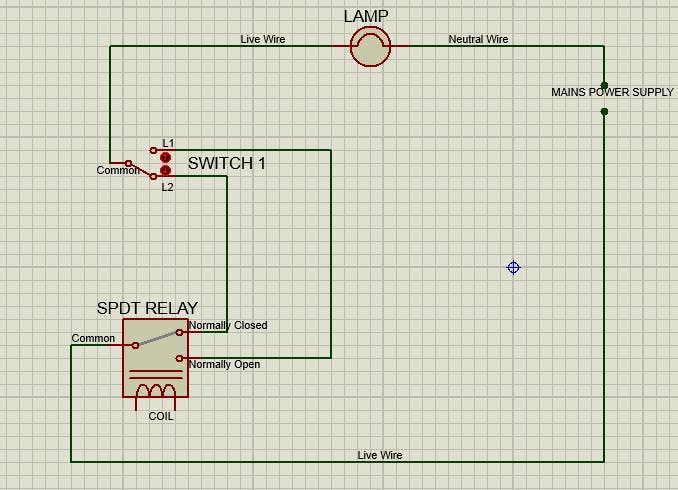 The rest of the circuit would be connected across the coil of the relay as it would function as the 'switch' controller for the relay.
The Lazy Switch Circuit
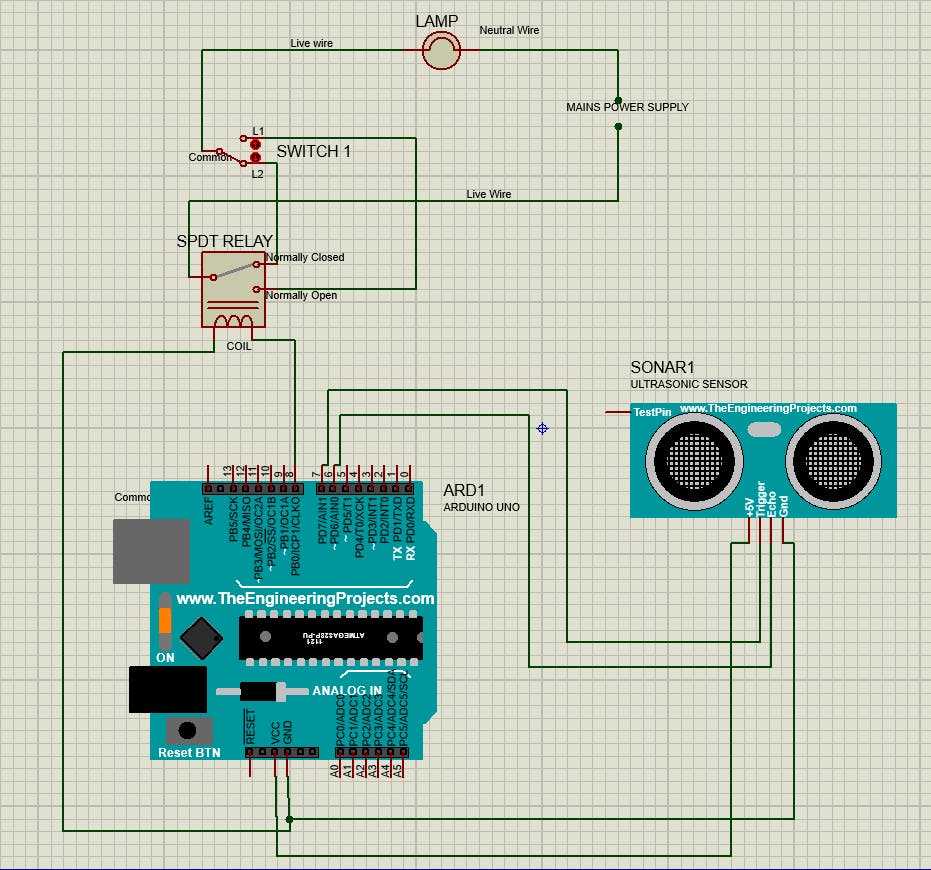
Combining the concept of the two-way switch with a relay, here is how the Lazy switch circuit would look like.
Finally, the Code
This was perhaps the simplest of all the entire process.
This is how the code would work: the ultrasonic sensor would continually read if there was an object within the preset distance. When an object was detected (hopefully my hand), a signal would be pushed to the relay which would be triggered to switch on/off depending on the previous state.
Here is the code with:
const int trigPin = 7; // Trigger Pin of Ultrasonic Sensor
const int echoPin = 6; // Echo Pin of Ultrasonic Sensor
const int relayPin = 8; //relay pin

long duration, inches, cm; //define the variables

void setup() {
   Serial.begin(9600); // Starting Serial Terminal
   pinMode(trigPin, OUTPUT);
   pinMode(echoPin, INPUT);
   pinMode(relayPin, OUTPUT);
}

void loop() {
   digitalWrite(pingPin, LOW);
   delayMicroseconds(2);
   digitalWrite(pingPin, HIGH);
   delayMicroseconds(10);
   digitalWrite(pingPin, LOW);

   duration = pulseIn(echoPin, HIGH);
   cm = duration / 29 / 2;

   //if distance is less than 10 cm and relay was off

   if (distance < 10){
    int relayState = digitalRead(relayPin); //check if the relay was on/off

    if (relayState == 1){//if the state is high
      digitalWrite(relayPin, 0); //turn it off
    }
    else if (relayState == 0){//else if the relay was off
      digitalWrite(relayPin, 1); //turn it on
    }
   }
}
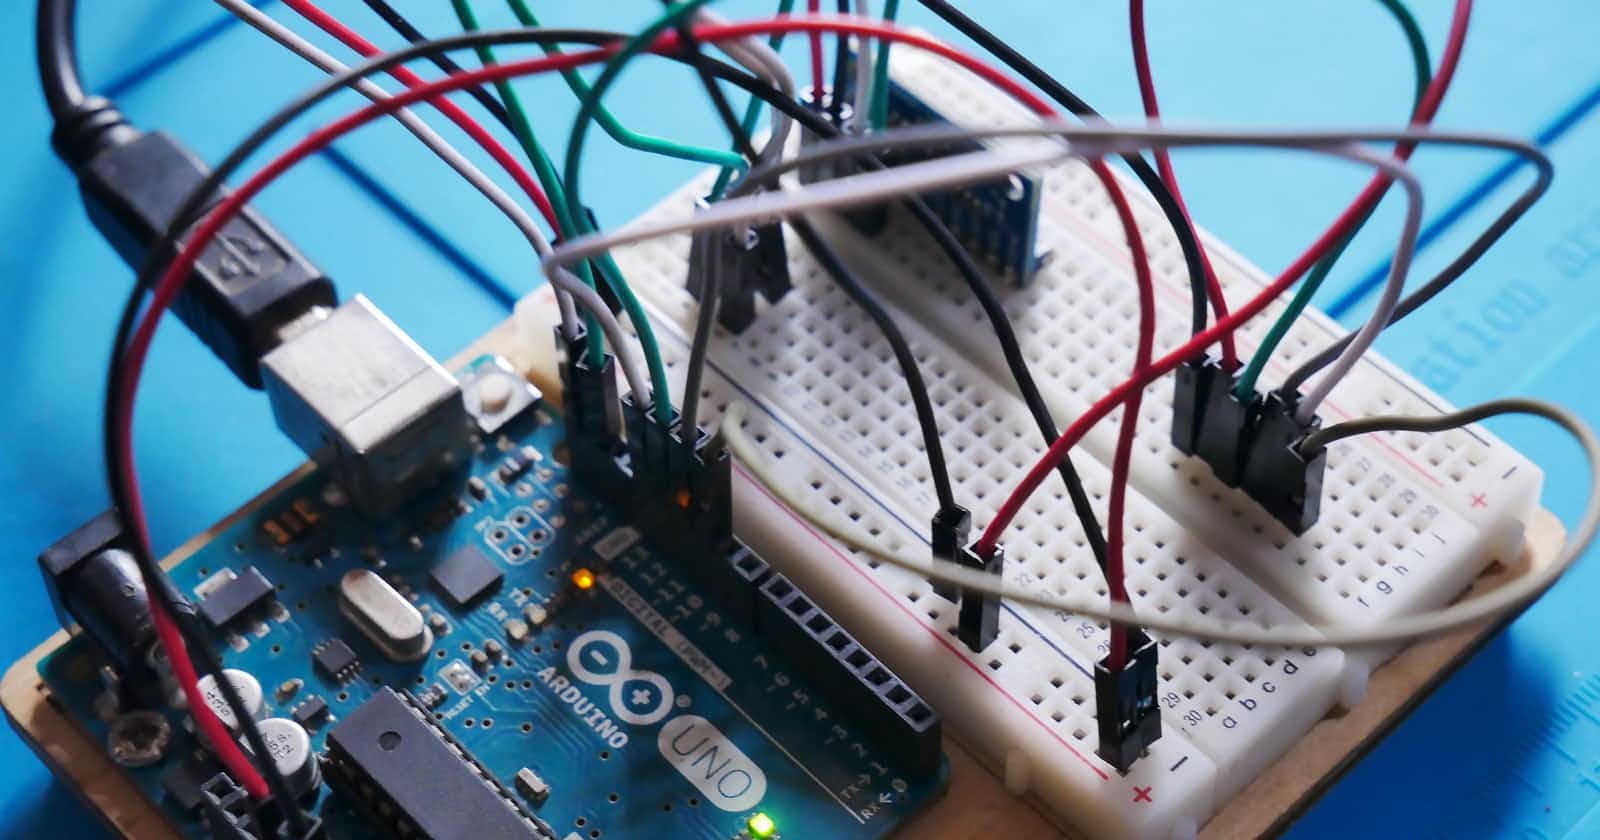
Implementing the Circuit
Finally, the validation that the project was complete came. But before that, I needed to figure out how I was going to place the device in my room.
I had decided I would build it a casing to hold it against the wall near my bed. So I had some fusion 360 3D design work to do, but I won't go into details on that today.
You might be wondering how I powered the device. Well, I connected the Arduino to power through its cable to a 5V charger.
Now, to the test.
Hurray! It worked🎊🎇
Or at least I thought it did for about 2 days before everything started going south.
The Bigger Problem
1.The relay
My relay started misbehaving and could snap back to N/C when left at the N/O position for some time.
2.The ultrasonic Sensor
The ultrasonic sensor started malfunctioning. It could read values that should not exist and at times trigger the relay without me putting my hand close.
3.The Lethal Danger
I realized that when working with voltage as high as 240VAC, I need to be careful about the kind of terminal block I was using. I was lucky enough to realize this without hurting myself.
You are all caught up now in my 'Miss Smart Home' projects. The Lazy switch is currently under improvement, and you will get an update on its ongoing later. It is one of the many devices I am building under 'Miss Smart Home' projects in the hopes of 'IoT'ing my home.