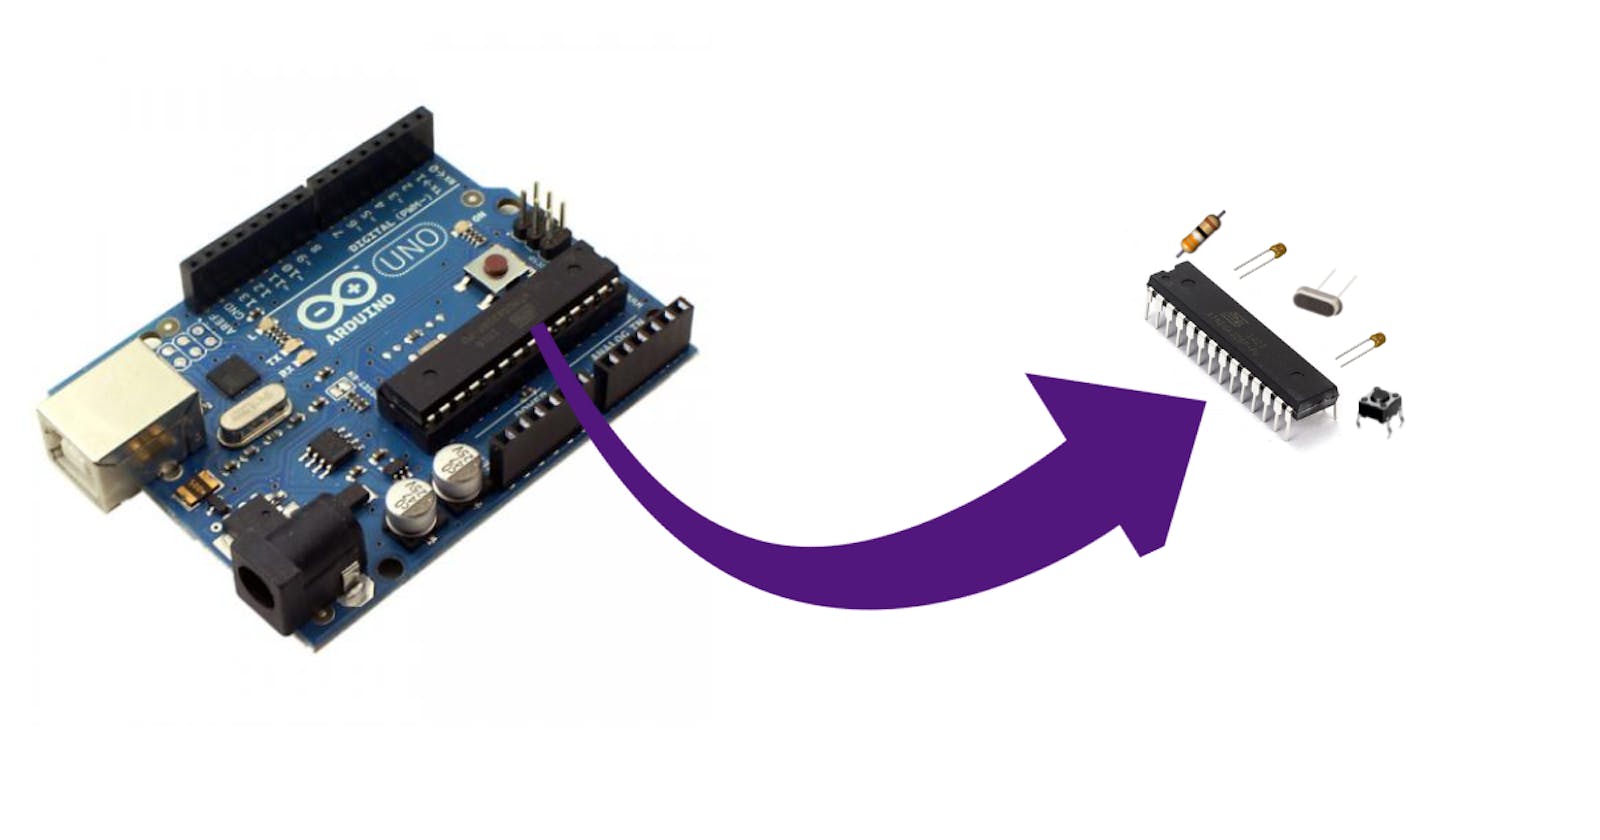


The Arduino Uno module is great for prototyping. However, when moving from prototyping to the project phase, it can be quite big and expensive to include in the final circuit board (PCB).
Rather than use the entire Arduino Uno module, the wiser solution would be to go for the chip found in the module: the AtMega328P.
Using the chip is cheaper and makes your circuit board less bulky and smaller.
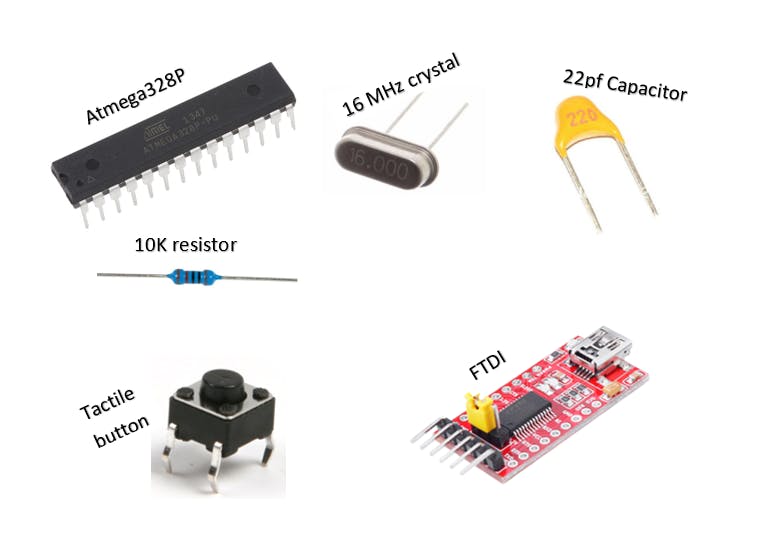
Components
- Atmega328P chip
- 16MHz crystal oscillator
- two 22pf capacitors
- 10K resistor
- Tactile button
- FTDI module (Optional)
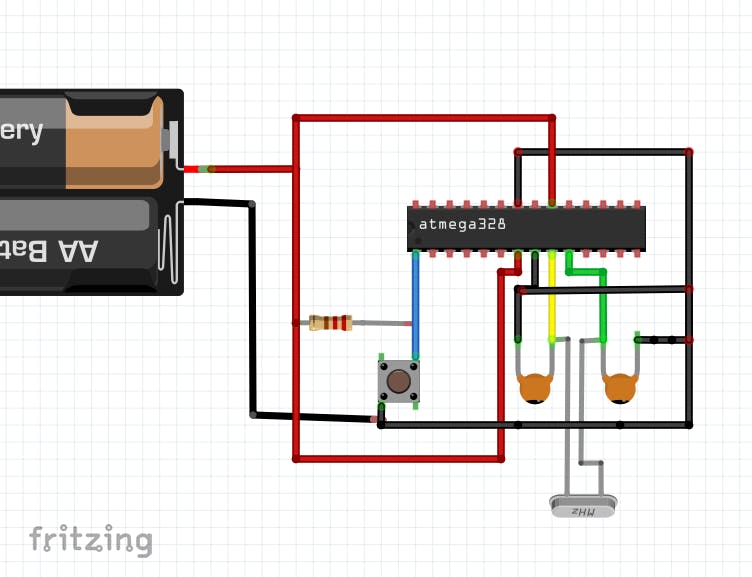
Connecting the components
Note: The pin number, in this case, is counted based on its hardware position; there are 28 hardware pins in the chip.
Resistor: pin 1 (reset) and VCC
Tactile button: pin 1 (reset) and ground (GND)
first 22pf capacitor: pin 9 and GND
second 22pf capacitor: pin 10 and GND
16MHz crystal: one side to pin 9 and other to pin 10
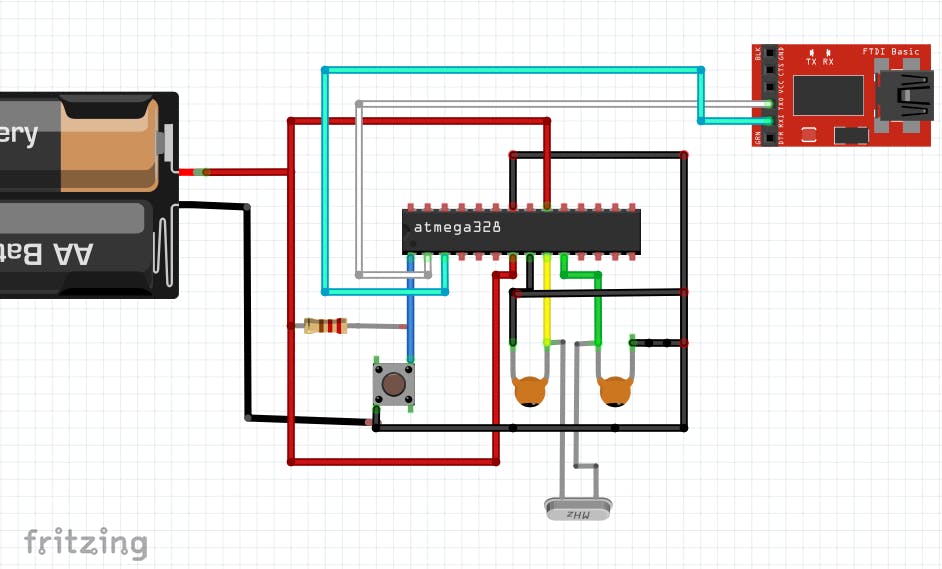
Connecting the FTDI
This is how the FTDI is connected to the chip.
FTDI ----> Atmega328P
RX -----> TX (pin 3)
TX -----> RX (pin 2)
Uploading code
After completing your code, connect the FTDI to your PC. Ensure you select the correct port at Tool --> Port.
For the board, select Arduino Uno. From Tools --> Boards
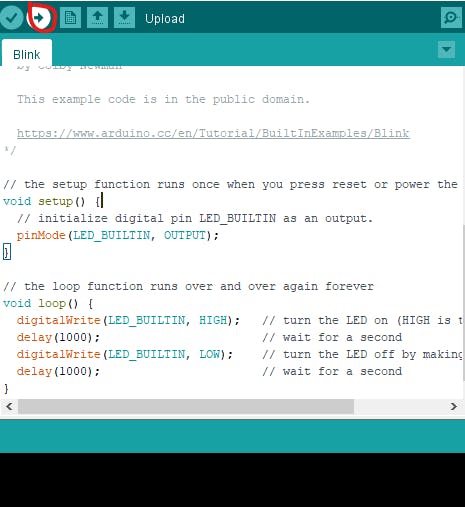
Click the upload button as highlighted red in the image below.
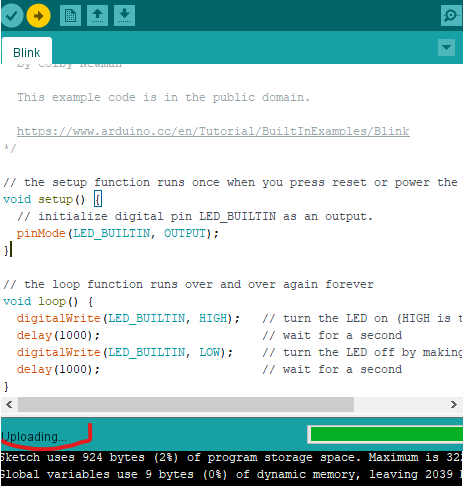
Immediately after the code finishes compiling and starts uploading, which you can see on the bar highlighted in red below, press the tactile button on the chip.
In case of an error, confirm that you have selected the right board and port, then upload again.
If you cannot find the port number under tools, it is likely that the FTDI is not recognized on your PC.
In this case, you will need to install drivers for the FTDI. The drivers are easily available with a simple search on the internet with clear instructions on how to install them.
No FTDI?
If you do not have an FTDI for uploading code to the chip, you can use an Arduino module. You can directly insert the chip into the Arduino Uno and upload the code into it, then remove it and add it to your project with the code already uploaded.
Some Tips
To use the Atmega328p in your circuit, consider getting a 28pin socket which will be soldered to the PCB and the chip fit on it. This prevents the chances of burning the chip during soldering. The dip in the socket guides you when placing the Atmega328p chip.
It is essential to consider the pin mapping of the Atmega328P to the Arduino Uno module. Below is an image showing the pin mapping. (Atmega 168 and 328p pin mapping is similar). Note that the counting of the pins starts at the dip in the chip.

